Why Is My Save As Greyed Out In Outlook For Mac
If you happen to be new to the baking process in Blender see the end of the article (problem 5!) for tips on generating a simple normal/bump map from both a shader and another object. Hi, Aidy Burrows here, bump map creation can itself be a bumpy ride and as for normal maps? Who can say what normal really is anyway?! Well, actually in this context probably a mathematician could easily tell us. This time we will create beautiful normal maps. And we do it the right way. Mac Pro Upgrade Adventure - Duration. Blender Tutorial - How to Create Normal Maps in Gimp - Duration. Normal map tutorial blender for mac.
Find answers to Outlook 2010 save as, save and options greyed out from the expert community at Experts Exchange. Sep 23, 2019 AutoSave switch greyed out, how to fix 'The Office AutoSave feature seems greyed out and is not available to work in my Office 2016 applications.I tried to turn on the AutoSave feature in the Excel and the Word so that I can automatically save important files while editing them.
 We were not disappointedI was so convinced in its efficacy in the applied qualitative field that I bought MAXQDA for my team when I joined Amazon. We brought in a MAXQDA certified trainer, and bought a network license so that our large team at Microsoft could use the tool. I spent several months researching the options, and ultimately decided to trial MAXQDA.
In the previous article we have discussed “How to Resolve Mac Outlook not Downloading Attachments?“. In this article, We will discuss the simple and quick tricks to resolve Outlook 2016 for Mac Attachments greyed Out.
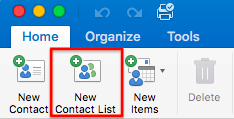
Outlook 2016 for Mac is the latest version of Outlook for Mac users. With the release of customized Outlook 2011 version for Mac OS, Microsoft has extended their reach to a large section of Mac users. Outlook 2016 included some more useful features and gathered a bigger fanbase. However, the 2016 version of Outlook for Mac is not free of bugs. One of the most common issues faced by Mac Outlook users is attachment greyed out in Outlook for Mac. In this post, we will discuss how to troubleshoot Outlook 2016 for Mac attachments greyed out issue. First, we will learn more about the problem.
What is Outlook 2016 For Mac Attachments Greyed Out Problem
When this problem occurs, users are barred from downloading the received attachments. Though all attachments are visible in the emails, they are greyed out. So, the user becomes unable to click on the attachments in order to download. Waiting for some minutes might help but not in all occasions. If the same emails are accessed from OWA or tablets or smartphones, this issue has not been encountered. It seems that the attachments greyed out is exclusively Outlook 2016 for Mac problem.
Real User Queries to Understand Mac Outlook Attachments Greyed Outlook Problem
We have taken some user queries from different forums to have a better idea about Mac attachments greyed out in Outlook 2016.
User Query 1: “Hello there. I own an Admin account of office 365 and the issue I will talk about has occurred to one of our employees. The person in question cannot download the attachment he gets with Outlook 2016 emails as they are greyed out. This problem is not present when he tries to download the attachments from OWA or smartphone. It seems that the email attachment greyed out problem only occurs in Outlook 2016 for Mac. Please help us out with an easy solution.”
We can see that how this issue is affecting Outlook for Mac users. That is why, we have decided to enlist some of the solutions to this problem.
Ways to Resolve Outlook for Mac 2016 Attachments are Greyed Out Issue
Users can try these workarounds to get rid of this issue.
- Since this problem does not appear in Outlook Web App, try viewing the attachments through OWA. Users can also download the attachments from smartphones and tablets.
- Forward the emails to yourself but only with the attachments. You can download the attachments from the forwarded emails.
- Users can also try moving emails to another folder and emptying cache. Follow these steps to do that:
- Create a new folder in your Outlook for Mac 2016 and give it a name.
- Now move all the emails with attachment greyed out problem to that folder.
- Right-click on the folder and select Properties option.
- Now, click on Empty Cache.
- If prompted with any warning message, click OK.
Apart from these, users can check the solution from Microsoft. This issue has been a bug of Outlook 2016 for Mac and in March 2018, Microsoft fixed this issue in their latest Outlook Mac version. Click on Help>> Check for Update in Mac Outlook to get the latest update (16.11). Then they have to follow the procedure in AutoUpdate Wizard.
The installation of this update should help you get rid of this problem permanently. If this also does not work and the attachments are still greyed out in your Outlook, click on Get entire message. This should solve your problem.
Final Words
Attachments greyed out is undoubtedly an annoying problem or the Outlook Mac users. To help them with that problem, we described how to troubleshoot Outlook 2016 For Mac attachments greyed out. Users can try the workarounds shared in this post. Otherwise, they can choose the solution provided by Microsoft. Using the methods discussed here, this issue can be solved permanently.
Comments are closed.
You may notice that the “Junk” option in Microsoft Outlook 2016 or 2013 is grayed out. When this is the case, you are not able to access the options to block email or access the Junk Email Options screen. The option is usually grayed out both on the Home tab and when you right-click on a message.
Solution 1 – Registry Fix
- Hold the Windows Key and press “R” to bring up the Windows Run dialog.
- Type “regedit“, then press “Enter“.
- Navigate to the following location in the registry:
- Current user
- Software
- Policies
- Microsoft
- Office
- 15 (May be 14 in some cases)
- Outlook
- Open “disableAntispam” and change value to “0“
If this setting keeps getting reset and you are working in a company environment, contact your IT personnel.
Solution 2 – Plugin Conflict
Another reason that “Junk” may be grayed out, is a plugin may be interfering with the setting. This is often the case when security software is installed on the computer. You can check for and disable these plugins using these steps.
- Press and hold the Windows key, then press the “R” key to bring up the run dialog.
- Type “outlook /safe” without quotes, then select “OK“.
- Select the name of your profile.
- Select “File” > “Options” > “Add-ins“.
- Select the “Go…” button at the bottom of the window where it says “Manage COM Add-ins“.
- Review the list for anything that you think may interfere with the Junk setting. Uncheck those items.
Solution 3 – Access Through Office 365 Interface
Another reason the Junk option might be because you are using Outlook in a corporate environment where the Junk email options are controlled from “The Cloud” via the Office 365 service. If this is the case, you won’t be able to access the Junk settings from the Junk selecting within Outlook. Instead, you will have to use the Office 365 interface by following these steps:
- From Outlook, select “File“.
- Next to the “Account Settings” setting, there will be a link you can select to access the link that will take you to the web interface.
- Type the username and password for your account. This is usually the same as the password you use to login to your workstation.
- Select the settings gear in the upper-right corner, then select “Options“.
- Select “block or allow“.
- The screen will be shown where you can select one of the following options:
- Don’t move email to my Junk Email folder – With this option, no email messages will be filtered.
- Automatically filter junk email – With this option, you can add email addresses or entire domains to the safe senders and recipients or blocked senders list.
- Select “Save” when you’re done modifying the screen.