Docker For Mac Install
See 'docker run -help'. This is because on macOS the docker binary is only a client and you cannot use it to run the docker daemon, because Docker daemon uses Linux-specific kernel features, therefore you can’t run Docker natively in OS X. So you have to install docker-machine in order to create VM and attach to it.
With Visual Studio for Mac, you can easily build, debug, and run containerized ASP.NET Core apps and publish them to Azure.
Prerequisites
Installation and Setup
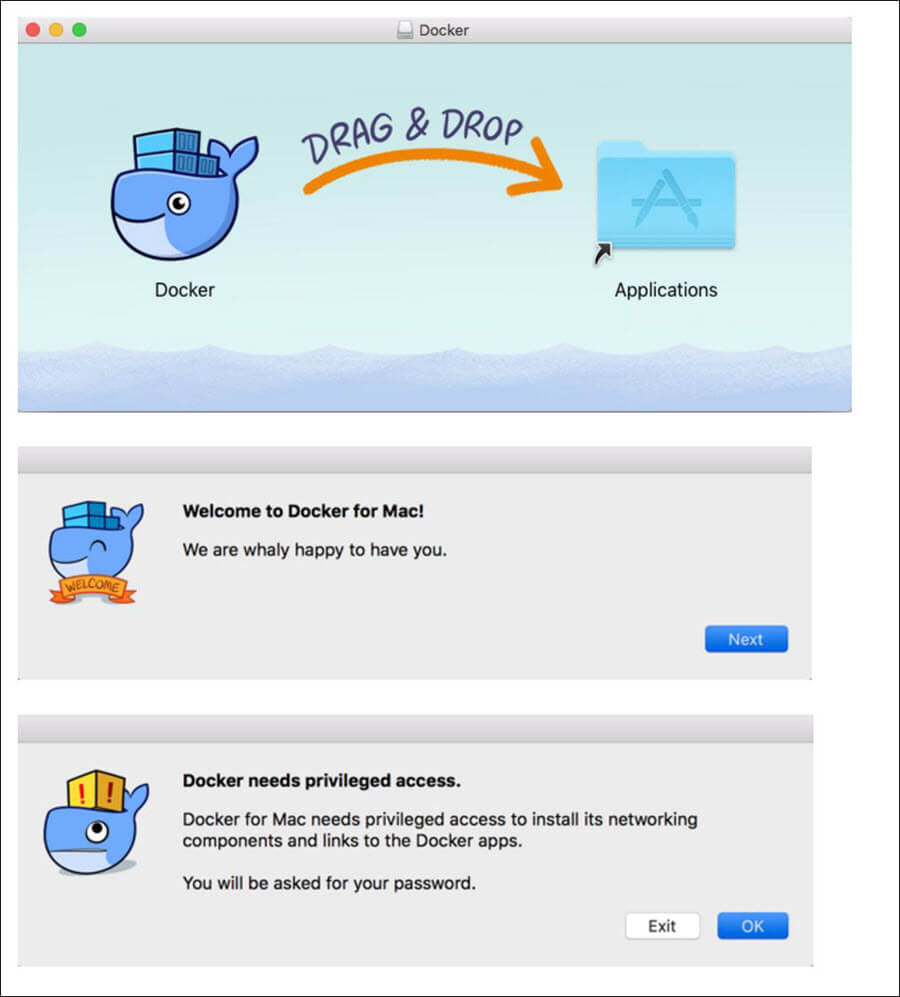
For Docker installation, review and follow the information at Install Docker Desktop for Mac.
Creating an ASP.NET Core Web Application and Adding Docker Support
- Create a new solution by going to File > New Solution.
- Under .NET Core > App choose the Web Application template:
- Select the target framework. In this example we will use .NET Core 2.2:
- Enter the project details, such as name (DockerDemo in this example). The created project contains all the basics you need to build and run an ASP.NET Core web site.
- In the Solution Pad, right click the DockerDemo project and select Add > Add Docker Support:
Visual Studio for Mac will automatically add a new project to your solution called docker-compose and add a Dockerfile to your existing project.
Dockerfile Overview
A Dockerfile is the recipe for creating a final Docker image. Refer to Dockerfile reference for an understanding of the commands within it.
The preceding Dockerfile is based on the microsoft/aspnetcore image, and includes instructions for modifying the base image by building your project and adding it to the container.
Note
The default Dockerfile created by Visual Studio for Mac exposes Port 80 for HTTP traffic. To enable HTTPS traffic, add Expose 443 to the Dockerfile.
Debugging
Select the docker-compose project as the Startup Project and start debugging (Run > Start Debugging). This will build, deploy and launch the ASP.NET project in a container.
Autocad for mac 2018. Tip
On the first run after installing Docker Desktop, you may receive the following error when trying to debug: Cannot start service dockerdemo: Mounts denied
Add /usr/local/share/dotnet/sdk/NuGetFallbackFolder to the File Sharing tab in Docker Desktop:
When the build is completed, the application will be launched in Safari:
Note that the container will be listening on a port, http://localhost:32768 for example, and this port may vary.
To see the list of running containers, use the docker ps command in Terminal.
Note the port relay in the screenshot below (under PORTS). This shows that the container is listening on the port we saw in Safari above and relaying requests to the internal webserver on port 80 (as defined in the Dockerfile). From the application's perspective, it is listening on port 80:
This post provides a step-by-step guide with a list of commands on how to install Docker on macOS using Homebrew. Docker is a computer program that performs operating-system-level virtualization, also known as “containerization”.
What is Docker?
“Containers are isolated from each other and bundle their own tools, libraries and configuration files; they can communicate with each other through well-defined channels. All containers are run by a single operating system kernel and are thus more lightweight than virtual machines. Containers are created from “images” that specify their precise contents. Images are often created by combining and modifying standard images downloaded from repositories.” ~ AWS CLI
What is Homebrew?
Homebrew is a free and open-source software package management system that simplifies the installation of software on Apple’s macOS operating system. It is known as the missing package manager for macOS.
Quick Commands
The following is the single command required to install Docker on macOS using Homebrew.
Brew Commands
This section provides a quick set of commands on how to install Docker on macOS using Homebrew. It is assumed that Homebrew is already installed. If not, please follow this link.
Summary
Congratulations! You have successfully installed Docker on macOS making use of Homebrew. Follow me on any of the different social media platforms and feel free to leave comments.