Timeline Software For Mac
Mac-robber is a digital forensics and incident response tool that can be used with The Sleuth Kit to create a timeline of file activity for mounted file mac-robber is a digital forensics and incident response tool that can be used with The Sleuth Kit to create a timeline of file activity for mounted file systems.
Timeline
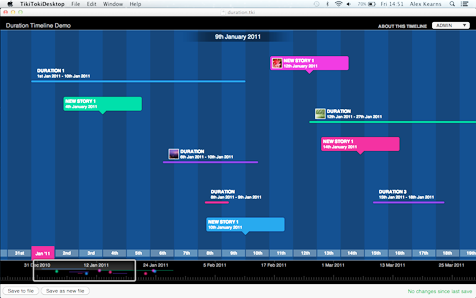
Timeline is the presentation of a chronological sequence of events along a drawn line that equips a viewer to understand temporal relationships quickly. Timeline is important in understanding history and make scheme. The correct visual representation of events, symptoms or treatments can mean the difference between life and death. Timeline makes it easy for professionals to analyze, plan or layout a series of events in a simple, clear and high quality way. Timeline is also sometimes extended to mean a chronology in tabular, year-by-year paragraphs, or other form.
Automatic Vector-based Timeline Software
Edraw Max can be applied as an easy vector timeline software with rich examples and templates. It has the tools to make it easy to create a professional-looking timelines, history, schedules, timetables and PERT diagram. Free Timeline is simple yet very powerful - it allows entry of both events and time periods; it scales automatically; it color-codes collapsible timeline groups; it also supports links and images. It can export to PDF, PowerPoint, Word and Graphics.
Please visit the following link to learn how to create a timeline:
System Requirements
Works on Windows 7, 8, 10, XP, Vista and Citrix
Works on 32 and 64 bit Windows
Works on Mac OS X 10.2 or later
Sonar viewer for mac. Sonar is an easy-to-use program that lets you track submissions and responses, and we think it's an invaluable tool if you send a lot of work out and have trouble keeping up with the who, what, where, and when of the process.The program's interface is plain and intuitive, and it took us no time at all to figure it out.
Tagged on: Matrix Template
Top Features
- Advanced functionality with automatic functions supported by drag-and-drop interface and point-and-click editor.
- High reliability: Trusted by users around the world. Over 6 million downloads.
- Practical usability: Is to use with predefined elements (hundreds of templates and 8000+ symbols), drag-and-drop interface and dynamic instructions.
- High efficiency: Can generate a timeline in less than 10 minutes. What is more, over 200 types of diagrams are supported.
- Guaranteed maintainability: Offers free technology support and lifelong upgrade chance.
Start to Draw a Timeline
Click here to download Timeline Software. Then you can use the built-in timeline template to create and present your timelines instantly.
Timeline Template
In the start page, you can choose the timeline template in the Project category. Timeline template lets you create great-looking charts quickly using its built-in symbol elements and auto-placement of events.
All these symbols are vector and can be recolored and scaled.
Free Timeline Examples
Edraw includes some free examples to help you understand how to draw timeline quickly. The following example shows a simple-to-draw timeline.
How to draw Timeline
Firstly, drag a timeline bar from the template. There are three basic timeline bar symbols in it. You can choose any one to use as the basic linear timeline axes. Then drag the mission above the axes.
Move the yellow control point to change the position of milestones and interval markers. Double click the text and type the information you want.
You can switch to the Insert menu to add hyperlinks and pictures for the markers. It's easy to change the background. Only drag a background icon from the built-in background template.
You can use Time Machine, the built-in backup feature of your Mac, to automatically back up all of your files, including apps, music, photos, email, documents, and system files. When you have a backup, you can restore files from your backup if the original files are ever deleted from your Mac, or the hard disk (or SSD) in your Mac is erased or replaced.
Create a Time Machine backup
To create backups with Time Machine, all you need is an external storage device. After you connect the device and select it as your backup disk, Time Machine automatically makes hourly backups for the past 24 hours, daily backups for the past month, and weekly backups for all previous months. The oldest backups are deleted when your backup disk is full.
Connect an external storage device
Connect one of the following external storage devices, sold separately. Learn more about backup disks that you can use with Time Machine.
- External drive connected to your Mac, such as a USB, Thunderbolt, or FireWire drive
- External drive connected to an AirPort Extreme Base Station (802.11ac model) or AirPort Time Capsule
- AirPort Time Capsule
- Mac shared as a Time Machine backup destination
- Network-attached storage (NAS) device that supports Time Machine over SMB
Select your storage device as the backup disk
When you connect an external drive directly to your Mac, you might be asked if you want to use the drive to back up with Time Machine. Select Encrypt Backup Disk (recommended), then click Use as Backup Disk.
An encrypted backup is accessible only to users with the password. Learn more about keeping your backup disk secure.
If Time Machine doesn't ask to use your drive, follow these steps to add it manually:
- Open Time Machine preferences from the Time Machine menu in the menu bar. Or choose Apple () menu > System Preferences, then click Time Machine.
- Click Select Backup Disk (or Select Disk, or Add or Remove Backup Disk):
- Select your external drive from the list of available disks. Then select ”Encrypt backups” (recommended) and click Use Disk:
If the disk you selected isn't formatted as required by Time Machine, you're prompted to erase the disk first. Click Erase to proceed. This erases all information on the backup disk.
Enjoy the convenience of automatic backups
After you select a backup disk, Time Machine immediately begins making periodic backups—automatically and without further action by you. The first backup may take a long time, depending on how many files you have, but you can continue using your Mac while a backup is underway. Time Machine backs up only the files that changed since the previous backup, so future backups will be faster.
To start a backup manually, choose Back Up Now from the Time Machine menu in the menu bar. Use the same menu to check the status of a backup or skip a backup in progress.
Learn more
- If you back up to multiple disks, you can switch disks before entering Time Machine. Press and hold the Option key, then choose Browse Other Backup Disks from the Time Machine menu.
- To exclude items from your backup, open Time Machine preferences, click Options, then click the Add (+) button to add an item to be excluded. To stop excluding an item, such as an external hard drive, select the item and click the Remove (–) button.
- If using Time Machine to back up to a network disk, you can verify those backups to make sure they're in good condition. Press and hold Option, then choose Verify Backups from the Time Machine menu.
- In OS X Lion v10.7.3 or later, you can start up from your Time Machine disk, if necessary. Press and hold Option as your Mac starts up. When you see the Startup Manager screen, choose “EFI Boot” as the startup disk.